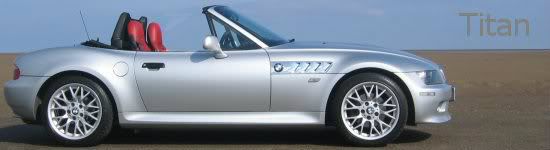
This was the day we put the deposit down on Zed, back in april 2009. I couldn't believe we bought one. then the fun started.

Since then its had:
Sony bluetooth head unit
Clear rear light/indicators
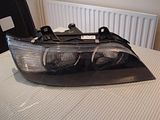
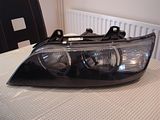
Jonttt's old Z3M's clear headlights
Refurbed MV1 replica 17" alloy wheels
Alpine speaker upgrade.
Winter Revamp 2009:
Well it’s been a long winter without drive in my Zed. I put the car away back in October before the bad weather kicked in. My plans over winter were to replace the original springs with my newly acquired Eibach springs.
Things started well back in December, I had a week on call at home a got round to jacking the car up and start dismantling the back end.

I trawled zroadster for a decent thread of how to replace the back springs. I came across Simon’s thread on changing the springs, which was a great help
Well with the car jacked up and instruction in had the fun commenced. My plan was only to have a quick spring clean under there and change the springs. It turned out that I was going for a full revamp. I bought new poly ARB bushes (15/24mm) and control arm bushes from Pri Racing, front/rear ARB drop links (ebay), Spax VSX non adjustable dampers and E-TECH strut brace from Larkspeed, Eibach springs (ebay), rear shock top mounts (ebay), front spring mounts (BMW), stainless steel mount reinforcement plates and all the nuts/bolts/spring pads/gaskets to do the job.
The rear end cleaned up with new ARB bushes


The rear end fully rebuilt


And the rear shock mount reinforcement plates fitted

I cleaned up the trailing arms and sprayed them with hammerite satin black paint. All done in a week he was lowered, spun round and the front jacked up.
I found more inspiration from [url=hptt://www.zroadster.net/forum/viewtopic.php?t ... highlight=]Deano1712[/url] with his winter thread. Thanks again for the advice. I stripped the front end as per Simon’s’s instruction and removed the X brace and engine brace ready for a cleanup and a dust over with more satin black paint.


I supported the hub with a bungee cord through the strut housing and attached to the slam panel

I supported the engine with a bottle jack near the gear box on the sump and a trolley jack near the water pump. I also support the steering rack with some plastic blocks so that it wasn’t damaged.

All cleaned up and sprayed with hammerite


I did have a little accident with the wish bones/control arms. I only had primitive tools and a crow bar to leaver off the control arm ball joins. The outcome was two broken ball joins. For the price of changing them it was easier to buy new. I also have to admit, whilst removing the control arm bushes I managed to sink my hacksaw blade in the mount and rendered it U/S
I did manage to pick the whole set up from ebay for £95 delivered and the quality is very good.

I then set about pressing the new front control arm bushes into the mounts, People said a vice would be need to press them in but I didn’t have one. With a little thought I came up with this little contraption.

A bit of threat bar, double locked nuts at the bottom, and a few 60mm washer it tightened up into the mount with ease.

All put together it look very professional.
I then had the front ARB assemble with the new poly bushes and new drop links

I then had the front shock assembled at kwik fit for the price of a cheap sent of spring clamps

I had them built up with new spring pads, washers, spring plates and new BMW guide support (and BMW parts department gave me a discount on the mounts and spring plates without me even asking for it, Result!!!!!!).
All rebuilt and cleaned up I was very impressed with myself


When the car was lowered to the floor I finished the revamp off with a shiny new E-Tech brace.

Fitting took a bit of gentle persuasion, but it fitted a treat and looks the business.


I then managed to get Zed out and for a spin on Saturday afternoon for the first time in four months and it was fantastic!!!! I took it easy at first to make sure everything was ok and that nothing was loose or knocking and it went like a dream. It was 2 degrees, I had my hat on and the hood down!
When I got back the suspension had settled nicely to give it a better looking stance, Even the misses commented on it. A pleasant change to “how much have you sent on it now”
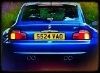
Before

After

I don’t dare look at the receipts as I have feeling it wasn’t cheap
Thanks again to all the lads for their help and advice and zroadster for helping me find it